These days energy efficiency is not just a buzzword; it’s a practical necessity for homeowners. One of the most effective ways to enhance the energy efficiency of your home is through loft insulation. In this article, we delve into the fascinating world of loft insulation, examining its composition, the recommended depth, the benefits, and the steps to insulate your loft.

What is Loft Insulation and What is it Made From?
Loft insulation is a layer of material added to your loft to reduce heat loss, thereby keeping your home warmer in winter and cooler in summer. The most common types of loft insulation materials are mineral wool, polystyrene and foam insulation. These materials are renowned for their excellent insulating properties, affordability, and ease of installation.
How Thick Should Loft Insulation Be?
In the UK, the Energy Saving Trust recommends a minimum depth of 270mm for loft insulation. This depth is based on the performance of mineral wool insulation, which is the most commonly used material. If you’re using materials with better insulation properties such as rigid foam boards or blown-in insulation, you may need a lesser depth.
The Benefits of Loft Insulation
- Energy Efficiency: Loft insulation significantly reduces heat loss, thereby reducing the need for central heating in winter and air conditioning in summer. This leads to lower energy consumption and lower energy bills.
- Comfort: A well-insulated loft helps maintain a steady indoor temperature, making your home more comfortable throughout the year.
- Environmentally Friendly: By reducing energy consumption, loft insulation contributes to reducing carbon emissions, making your home more environmentally friendly.
- Increased Property Value: Homes with good insulation often command a higher market value as more buyers are recognising the value of energy efficiency.
How to Insulate a Loft
The process of insulating your loft is straightforward, but it requires careful planning and execution.
Step 1: Assess Your Loft – Before you start, inspect your loft for any potential issues such as dampness, leaks or structural issues. These need to be addressed before you proceed with the insulation.
Step 2: Measure Your Loft – Measure the length and width of your loft to calculate how much insulation material you’ll need. Remember to factor in the advised depth of 270mm.
Step 3: Purchase Insulation Material – Choose your insulation material based on your budget, your loft’s characteristics and the desired insulation performance.
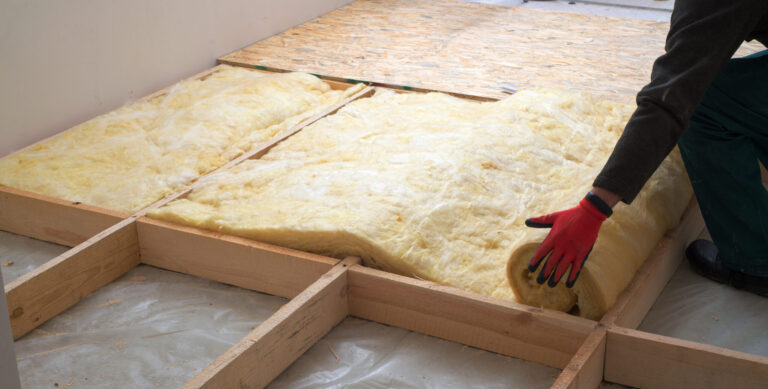
Step 4: Install the Insulation – Starting from the furthest point from the loft hatch, roll out the insulation between the joists. Once the first layer is installed between the joists, install a second layer perpendicular to the joists to cover them. If you’re using blanket insulation, make sure to cut it neatly around any obstructions such as pipes or the loft hatch.
Step 5: Don’t forget the hatch – After the insulation is installed, don’t forget to insulate the loft hatch and to install a loft walkway if you need to access the loft regularly.
Safety First
While insulating a loft is relatively straightforward, it’s essential to take precautions when handling insulation materials. They can be irritant, so wear protective clothing, gloves, and a face mask. If you’re unsure about any aspect of the process, it’s wise to hire a professional.
A well-insulated home is not just an energy-efficient home, but also a comfortable living environment that adds to your quality of life. So, whether you’re planning to stay put for years to come or thinking about putting your property on the market, loft insulation is a smart move that brings numerous benefits.